CS333
Mobile Development
Ilya Loshkarev loshkarev.i@gmail.com
Overview
Custom UI
Stylish Button
							override func viewDidLoad(){
								super.viewDidLoad()
								myButton.backgroundColor = UIColor.blackColor()
								myButton.tintColor = UIColor.whiteColor()
								myButton.layer.cornerRadius = 6
							}
Some basic properties of a view can be set in
the Interface Builder
Overriding Default Button
							class MyButton: UIButton {
								func stylize(){
									self.backgroundColor = UIColor.blackColor()
									self.tintColor = UIColor.whiteColor()
									self.layer.cornerRadius = 6
								}
								override init(frame: CGRect){
								    super.init(frame: frame)
								    stylize()
								}
								// ... required methods
							}
Overriding Default Button : 2
Assign your custom class to a button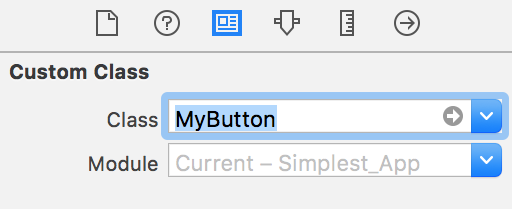
You should get mixed results:
button will look the same in IB,
but look as expected in simulator
Rendering in IB
							@IBDesignable
							class MyButton: UIButton {
								// The following is only executed in the IB
								override func prepareForInterfaceBuilder() {
									super.prepareForInterfaceBuilder()
									// IB tends to override some properties but not the others
									self.backgroundColor = UIColor.blackColor()
									// this is basically a hack to get the view to look properly
								}
							}
@IBDesignable shows that class is suitable for instancing in
the Interface Builder
Custom Properties in IB
							@IBDesignable
							class MyButton: UIButton {
								@IBInspectable var cornerRadius: CGFloat {
									get{ return layer.cornerRadius }
									set{ layer.cornerRadius = newValue }
								}
							}
@IBInspectable allows property to be set from
the Interface Builder
Custom Button
							@IBDesignable
							class RoundButton: UIButton {
								override func drawRect(rect: CGRect) {
									var path = UIBezierPath(ovalInRect: rect)
									// set fill color
									bacgroundColor.setFill()
									// fill previously defined path
  								path.fill()
								}
							}
All the drawing happens in the view's graphic context
Graphics
Graphics Context
							// Create bitmap and make it current context
							UIGraphicsBeginImageContext(view.frame.size)
							// Copy image into current context
							view.image?.draw(in: CGRect(origin: CGPoint.zero,
							                            size: view.image?.size))
							/* draw something */
							// Return an image from current bitmap-based context
							view.image = UIGraphicsGetImageFromCurrentImageContext()
							// Remove current bitmap context
							UIGraphicsEndImageContext()
Context contains drawing parameters
and all information needed to render the paint
Drawing with Core Graphics
All drawing happens in current graphics context
							func drawLine(from fromPoint: CGPoint, to toPoint: CGPoint) {
								// Create Path
								let linePath = UIBezierPath()
								linePath.moveToPoint(fromPoint)
								linePath.addLineToPoint(toPoint)
								// Set up context parameters
								UIColor.blue.setStroke()
								linePath.lineWidth = 10
								linePath.lineCapStyle = .round
								// Draw path in context
								linePath.stroke()
							}
Draw order is important
Paths are drawn on top of each other
Get Current Context
						override func draw(_ rect: CGRect) {
							// Get view's current graphics context
							if let context = UIGraphicsGetCurrentContext() {
								let startPoint = CGPoint.zero
								let endPoint = CGPoint(x:0, y:self.bounds.height)
								// Draw gradient in context
								context.drawLinearGradient(gradient!,
								                           start: startPoint,
								                           end: endPoint,
								                           options: .drawsAfterEndLocation)
								}
							}
Core Graphics Gradient
						// Set up gradient colors
						let colors = [startColor.cgColor, endColor.cgColor]
						// Set up the color stops
						let colorLocations:[CGFloat] = [0.0, 1.0]
						// Set up the color space
						let colorSpace = CGColorSpaceCreateDeviceRGB()
						// Create the gradient object
						let gradient = CGGradient(colorsSpace: colorSpace,
						                          colors: colors as CFArray,
						                          locations: colorLocations)
Core Animation Layer
Every view has underlying CALayer
							view.layer.contents = UIImage(named: "swift")?.CGImage
							// Layers can have sublayers
							let sublayer = CALayer()
							sublayer.frame = CGRect(x: 50, y: 50, width: 100, height: 100)
							sublayer.backgroundColor = UIColor.red.cgColor
							view.layer.addSublayer(sublayer)
Layers are rendered by the GPU
Blessings of GPU Rendering
- Fast graphics – layers are optimized for better use of graphical hardware
- Percise animations – Core Animation allows for more animation control and complexity then UIKit
- Rasterization control – layer content can be rasterized once and stored as bitmap
So Many Layers
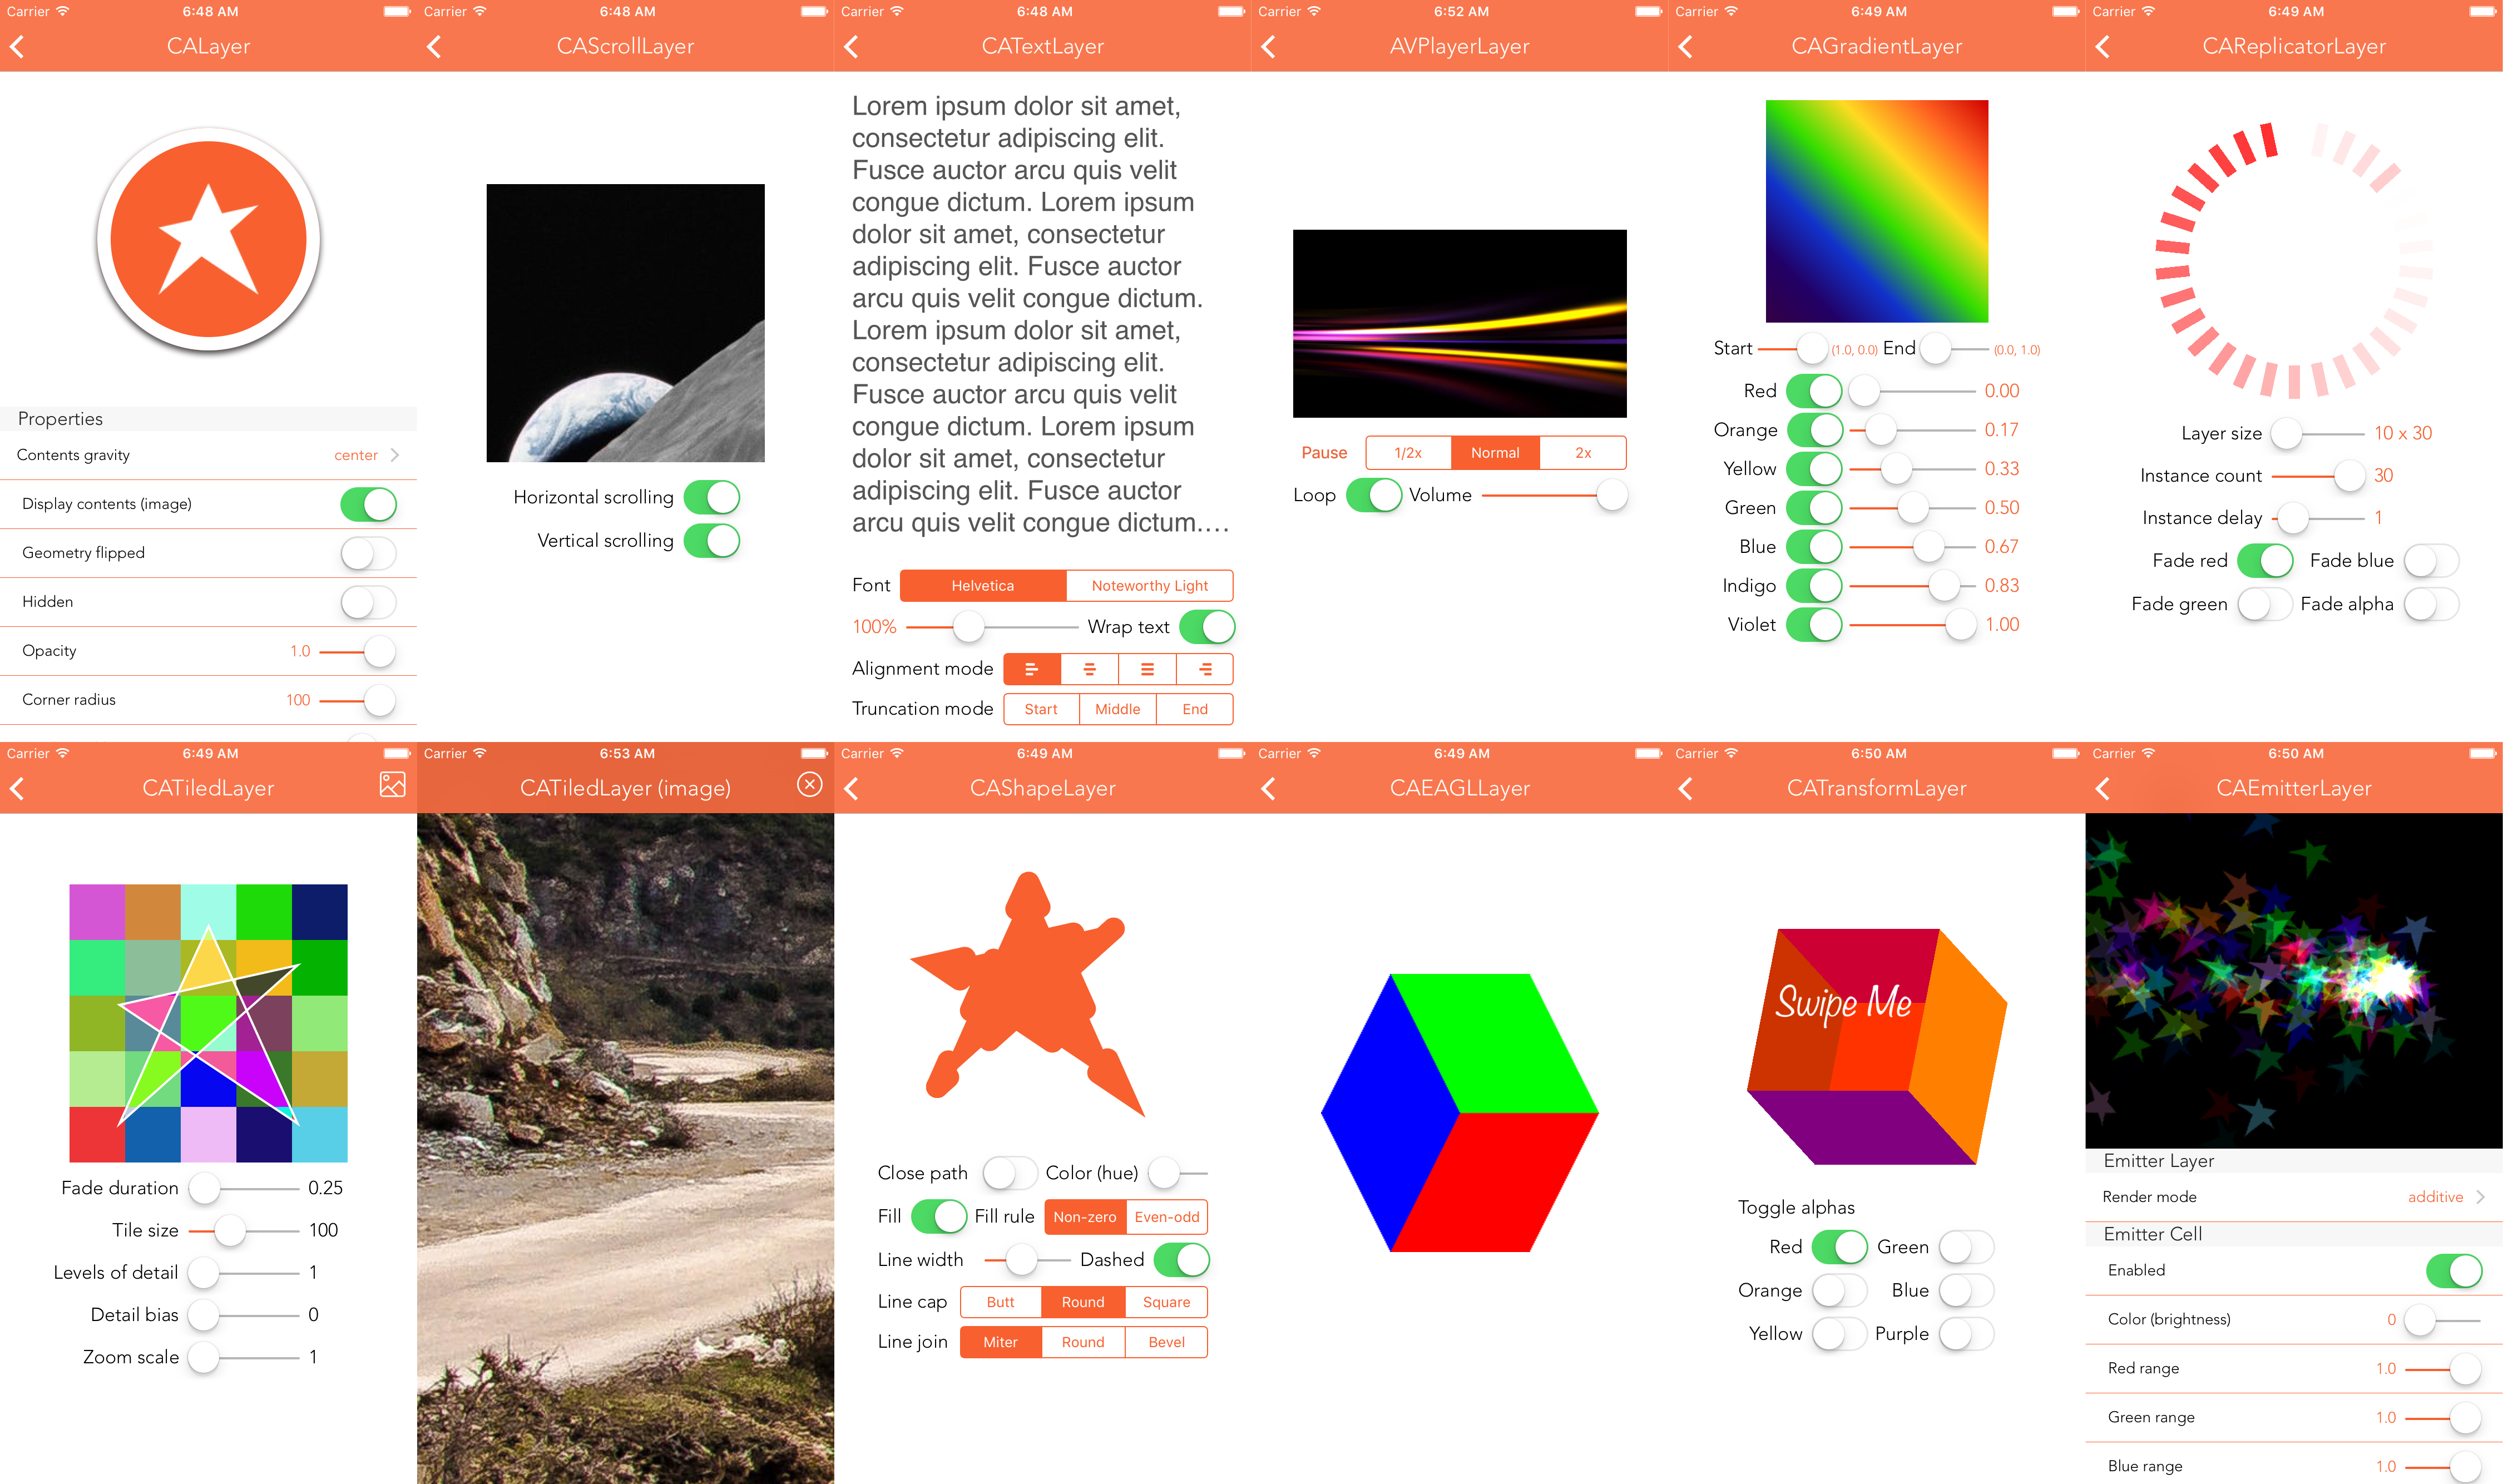 https://github.com/scotteg/LayerPlayer
Honorable Mention: CAMetalLayer
Gradient Layer View
							// layer is read-only property of UIView
							// we need to override it's type to change it
							override class var layerClass: Swift.AnyClass {
								// return Gradient Layer as view's layer type
								get { return CAGradientLayer.self }
							}
							// Simple layer access
							var gradientLayer: CAGradientLayer! {
								return layer as! CAGradientLayer
							}
							override init(frame: CGRect) {
								gradientLayer.colors = [startColor.cgColor, endColor.cgColor]
							}
Animation
Simple Animation
							// Rotate view 180 degrees
							UIView.animate( withDuration: 0.25, // length of animation in seconds
								delay: 0.0, // animation start delay
								options: [.curveLinear], // timing curve
								animations: { // animation closure
									view.transform = view.transform.rotated(by: CGFloat(M_PI))},
								completion: { finished in // called after animation is complete
									view.transform = CGAffineTransform.identity
							})
Lineary interpolates values
of a view's properties for a given duration
Uses shortest pass between the values
(360° rotation does nothing)
Animatable View Properties
- frame
- bounds
- center
- transform
- alpha
- backgroundColor
- contentStretch
You should never animate position properties
of a view with Auto Layout cnstraints
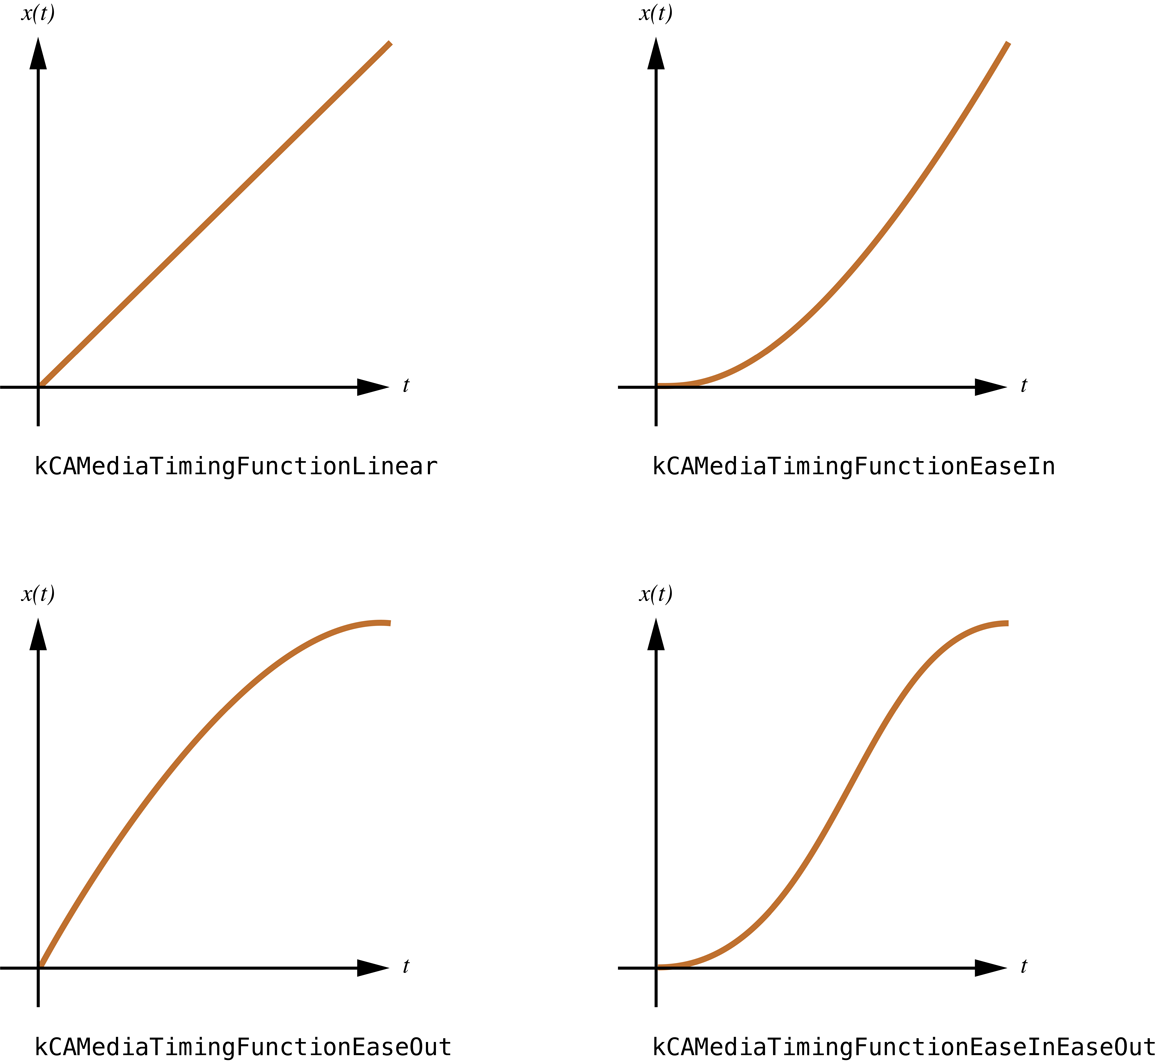
Timing Curve
Defines how fast values change
- Linear
- EaseIn
- EaseOut
- EaseInOut
Other Options
- repeat – repeats animation ad infinum
- allowUserInteractions – allows user interactions
- beginFromCurrentState – animation started in the middle
of another animation will use current values of a view
Keyframe Animation
Interpolates between user defined keyframes
							// Rotate view 360 degrees
							let duration = 1.0
							UIView.animateKeyframes( withDuration: duration,
								delay: 0.0,
								options: [.calculationModeCubic], // interpolation method
								animations: {  /* define frames here */ }
							)
Keyframes
								// Rotate 360 degrees animations closure
								let frames = 6
								let angle = 2 * M_PI / Double(frames)
								let frameDuration = duration / Double(frames)
								for i in 0..<frames {
									UIView.addKeyframe(
										withRelativeStartTime: Double(i) * frameDuration,
										relativeDuration: frameDuration,
										animations: {
											sender.transform = sender.transform.rotated(by: CGFloat(angle))
									})
								}
Each keyframe defines an animation
with its own delay and duration
UIView Animation Limits
- Animation is limited to view's properties
- Doesn't allow custom timing functions
- CPU based rendering
Layer Animations
- Rendered on GPU
- Shape Transitions
- 3D Transformations
- Clipping Animations
Basic Animation
							// Create new animation for path property
							var triangleAnimationLeft = CABasicAnimation(keyPath: "path")
							// Set up start value
							triangleAnimationLeft.fromValue = trianglePathSmall.CGPath
							// Set up finish value
							triangleAnimationLeft.toValue = trianglePathLeftExtension.CGPath
							// Set up delay
							triangleAnimationLeft.beginTime = 0.0
							// Set up duration
							triangleAnimationLeft.duration = 0.3
							// Perfornm animation on a layer
							triangleLayer.addAnimation(triangleAnimationLeft, forKey: nil)
Single triangle corner animation
Keyframe Layer Animation
							// Create new animation for path property
							var triangleAnimation = CAKeyframeAnimation(keyPath: "path")
							triangleAnimation.values = [trianglePathSmall.CGPath, trianglePathLeftExtension.CGPath]
							lineWidthAnimation.duration
Gestures
Storyboard Gesture Recognizers
Simplified Recognition
UITouch
Custom Gesture Recognizer
Related Resources
- iOS Technology Overview - Apple Developer
- https://www.raywenderlich.com/115440/auto-layout-tutorial-in-ios-9-part-1-getting-started-2 https://www.raywenderlich.com/90690/modern-core-graphics-with-swift-part-1
- https://developer.apple.com/library/content/documentation/2DDrawing/Conceptual/DrawingPrintingiOS/GraphicsDrawingOverview/GraphicsDrawingOverview.html#//apple_ref/doc/uid/TP40010156-CH14-SW1